

February 2004 - Tool Time!
- Feb 8, 2004
- 6 min read
2/8/2004 -
It's been awhile since my last entry. The last couple of weeks has been about air compressors. The Craftsmen Club flyer was mailed to me at the end of January and I spied a $268.99 33 Gal. air compressor with 1/2" impact wrench, 3/8" ratchet, and air hammer. At this point, I finally decided to upgrade my current 12 Gallon Craftsmen compressor to this size. I also owned a 4 gal. portable as well, so in order to make room, I sold both compressors for $180. Since I already had a Chicago Pneumatic's 1/2" impact, I sold the "new" 1/2" impact that came with the 33 Gallon compressor, for $20 more to one of the buyers. So overall, I paid a total of $91+change when you factor in the two compressors sold.
There is a reason for this upgrade. Aside from being able to work on the car and not have the tank refilling constantly, I'll also be able to run a sand blaster. I've decided to get a unit that will help clean out every donor part that I decided to keep. That will be down the road but for now, I've got the compressor and it makes my 12 gallon look puny by comparison:

I decided today was such a nice day, that I would work on a few donor items and the Thunderbird axle/CV joints was my first task. This turned out to be a 1/2 day thing as I realized after some fiddling with the snap rings, that a paddle style snap ring pliers was the real tool for getting some of these thick axle rings off.
After a trip to Sears, I removed a pair of snap rings off one axle. For the inner CV, this was necessary so I could get a good grip with my gear puller and yank off the needle bearing assembly. For the outer CV, I simply used "Don's Cobra Site" and took his suggestion and obtained a 2' pipe of 1-1/4" I.D. (about $5.40 at Orchard Supply) and used the weight of the entire shaft and CV to dislodge the axle from the CV. It took a few good slams and it popped right out, just as Don said! What's missing is a shot of the "disassembled" axle so here it is, minus boots and clamps:

2/10/2004 -
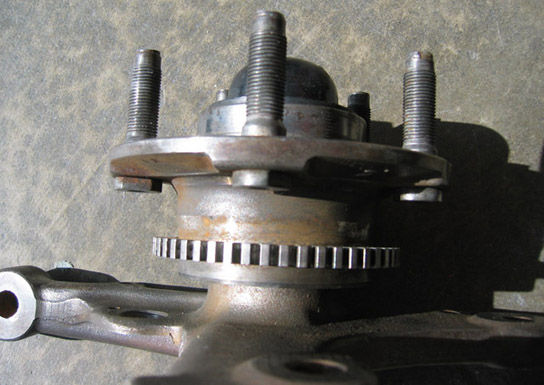
Today I decided to remove the ABS sensor rings. These are not necessary on our cars and it appears to be pretty much something that shouldn't take too long. After pinging some guy's on FFCobra.com, the concensus is, it can be removed (just wanted to be double sure. I didn't want to destroy these things.)
When I got home after work, it took just a mini sledge and about 10 minutes with the first one. I gave it a shot of "Liquid Wrench" in case rust was a factor. Using a 1/2" extension (so I wouldn't damage the casing), I worked around the ring until if finally came out. I started to do the 2nd one and it took only 2 good whacks! Turns out I cracked the 2nd ring so it came out in less than a minute. So what did this do for the CV's? Nothing really. Best estimate, I save a pound of weight. But the joint looks a lot cleaner.


2/14/2004 -
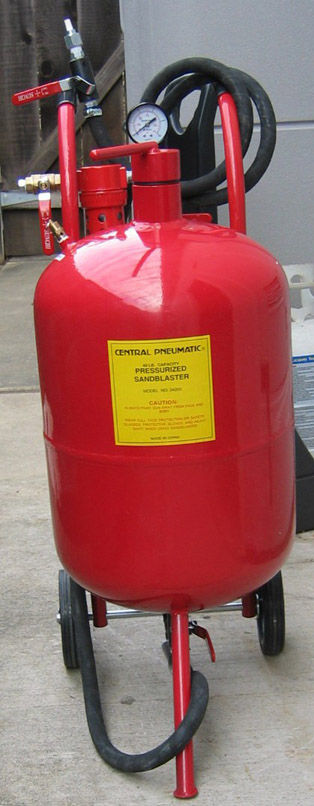
After months of preparing, I've finally obtained my Central Pneumatics Sand Blaster from Harbor Freights. The 40lb. capacity unit, was $79.99. Alum. Oxide media was $17.99, and Glass Bead media was $18.99 (both media was 25lbs. per box.) Since Harbor Freights had my email address, I received a $10 coupon which was used to help pay for the sales tax. I spent the rest of the afternoon assemblying this thing and used what felt like a few YARDS of teflon tapes on all the threaded components. There are 4 shutoff valves including the one for the nozzle sprayer. The unit came with 4 different sized oraficed nozzles. While the business end of the sandblaster will work, I'm thinkng maybe down the road, I'll acquire a 'gun style' unit instead. This one appears it'll be a challenge to work with. Haven't had a chance to try it but here's some photos of the unit:
2/21/2004 -
As of 10:00AM, the 91' Mustang GT "roller" has been sold off. From a dollar standpoint, I'll be taking a good $1500 loss as best as I can determine. However, as I've said before, the donor's biggest contribution was the permission it granted me to start the project. Having this in the driveway allowed my wife to accept I was serious about the project. That alone is priceless.
2/23/2004 -
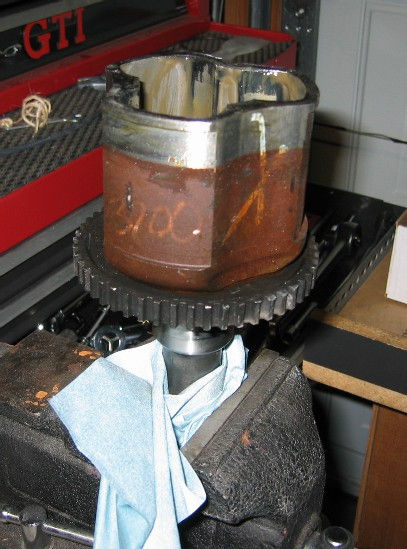
Tool binge again. This time I have obtained both a 12 ton Shop Press and a cabinet sand blaster. The 12 ton bottle jack style press had a slight fitment issue which I remedied with a few washers near the top of the assembly. I tried to press out the bearings on the Thunderbird carriers but so far have been unsuccessful. The shape of the carrier made it difficult to get a nice clean shot. I will have to rethink this assembly a bit and try to figure out how to best utilize the press to get the bearings out. Perhaps heat should be applied around the aluminum carrier? For now, the press isn't too large and sits right next to the engine hoist:


The sand blaster cabinet is actually a self containted unit that does not need the pressurized portable. However, for large parts like the differential or tranny, the pressurized unit will be the ticket. But for smaller parts, the cabinet appears to be the ticket:

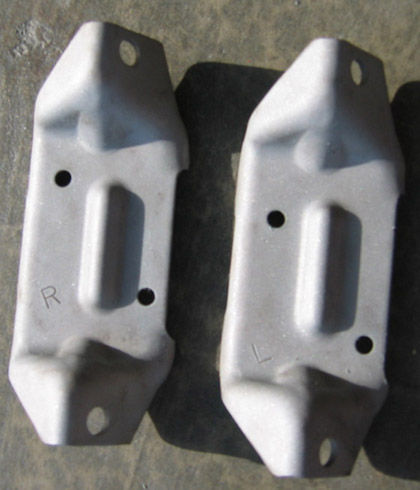
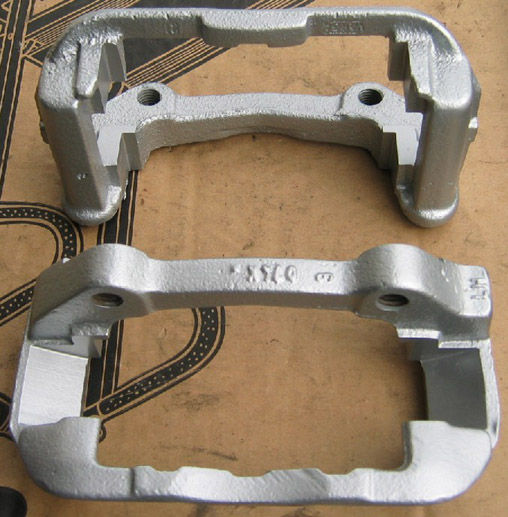
The next photo show just how little effort it took to clean off the rear brake bracket (note: the 30 minutes with the wire wheel one is pretty accurate when you consider I first tried it free hand and then with a vice, positioning it once in awhile.):


The "effort" it took to get the bracket clean is phenomonal. I feel a few more minutes getting to some of the areas I missed and it will be ready for some paint!
2/24/2004 -
More sand blasting fun today! The hardest thing so far is "seeing" past the plexiglas. I started these pieces plus the two brackets above around 1:30pm. I stopped around 4:30pm. Half the time was cleaning off the plexiglas due to all the dust, despite the built in fluorecent lamp. Part of me may just rig up a duct to suck out all airborne dust; everytime I lifted the lid to inspect the part, I got a face full of light dust. A few times I put a vacuume in so I could clear it out. In any event, this was probably the best $70 I've spent. I'll hit the CV joints another day, but like the axles, care needs to be taken to ensure you don't get dust in the bearings. I got a slight amount in one axle due to sand blasting off the masking tape by accident. The other was completely fine. Here are some more pics:
Engine mounting plates before:

Engine mounting plates after:
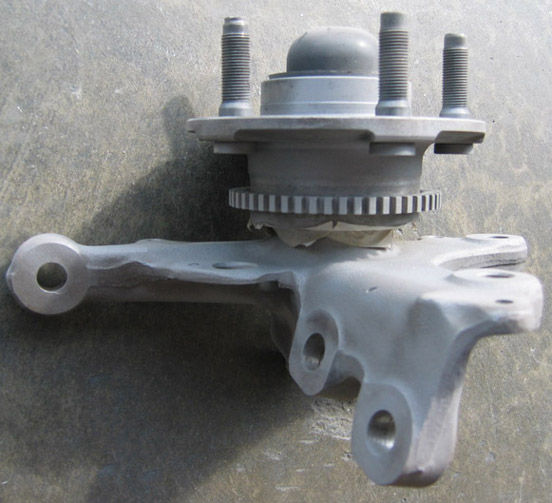
Front spindles before (wire brushed for at least an hour!):

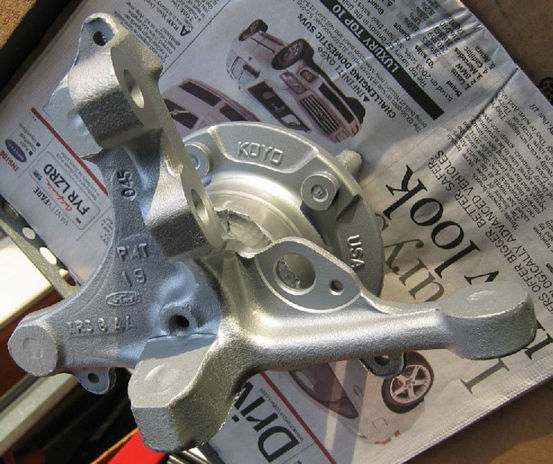
Front spindles after: (less than 30 minutes):

2/28/2004 -
After raising the question about the bearings in the IRS spindle, I went to Orchard Supply Hardware and spent a total of $38.17 for the following: Bernzomatic Propane torch, short section of galvanized pipe ( 3"x6" ), galvanized bell reducer ( 2" to 1" ) and since my press has a welded in driving rod, I obtained a square head plug for the bell reducer so it can be used with the rod.
I applied sufficient pressure on the bearing before I ignited the torch; I found a good 3"-4" flame and about 1-2 minutes is all it took to get the aluminum nice and "warm" when the bearing finally "popped" as others have said it would. Once unfrozen, the torch was turned off and the rest was gravy:


A big thanks to the "crew" on FFCobra.com (LuisO, acmickee, HankL, Stu, & Cody).
2/29/2004 -
Today, I did a touch up of the brake brackets. These things just immediately began to surface rust after a day! So I decided to paint them today. I washed down the brackets using brake cleaner. Dried them off and immediately applied two coats of Duplicolor Engine Enamel Grey Primer(DE1612) and two coats of Duplicolor Engine Enamel Aluminum (DE1615), both containing a percentage of ceramic material for heat resistance.
Later in the day I painted both spindles:

And in case we forgot how bad this looked:

Comments